


In the previous article, Creating a Free Bot with IBM Software, you learned how to create a bot using the IBM services at no cost. In this article, you’ll learn how you can take what you created previously and turn it into a cognitive bot that can stand on its own and be used to interact with your users.
Note that calling this a cognitive bot is just a fancy way of saying that the bot has intelligence built in. In the sample that was built in the previous article, you can ask the bot to tell a joke or say something funny and it will select one of a couple jokes that were included. You can say you are leaving via various phrases ranging from “bye” to “sayonara,” and the bot will display a message thanking you for coming.
As a reminder, IBM bots are called assistants. For this article, you can use the two words interchangeably. You’ll want to return to the sample assistant from that article by going to the IBM Cloud account you created and selecting the assistant. You can go to http://cloud.ibm.com and log into your dashboard as shown in Figure 1.

Figure 1: TheIBM Cloud Dashboard
From the Dashboard select View Resources. In your list of resources, you should have the service you created to hold your assistant. If you’ve done nothing more than what was shown in the previous article, then you should see the service you created. I had used “My Test Assistant” as shown in Figure 2.

Figure 2: List of Services
Go ahead and click on the My Test Assistant (or whatever name you had given the service). This will present the service resource page. Because all you are doing on this page is clicking on the Launch tool button, I’m not doing to display a picture. Click the Launch tool button to launch to jump into the IBM Watson Assistant as shown in Figure 3.

Figure 3: The IBM Watson Assistant
On this dialog, you can select to work with the Skills or to build the Assistant. If you select Skills from the tabs, you’ll be presented with the option to select the dialog you created in the previous article as shown in Figure 4, or you’ll be able to create a new dialog skill by selecting the Create New button.

Figure 4: The My Example Skills dialog
Clicking on the My Example Skills box in the middle of the dialog will open the dialog editor and return you to where the previous article ended. In this case, however, the dialog will be used to create an assistant that you will be able to use elsewhere. As such, instead of clicking on My Example Skill, click on the Assistants tab at the top, which will open a page that will allow you t create a new assistant as shown in Figure 5.

Figure 5: The Assistants tab
Click on the Create new button to start the process of creating a new assistant. This will present the Add Assistant dialog presented in Figure 6.

Figure 6: Adding a new Assistant
Give your assistant a name. As you can see in Figure 6, I named my assistant My IBM Joking Assistant since this is created with IBM Watson and the assistant that had been created told a couple of jokes. You can also add an optional description if you’d like.
You’ll also see that the Enable Preview Link button was checked by default. Leave this checked if you want a page created that will provide a test preview of your bot.
Once you’ve filled out the dialog, click the Create button to generate the assistant as shown in Figure 7.

Figure 7: Generating your IBM Bot
With the bot generated, you need to associate the skills you had created to it. This can be done by clicking on the Add Dialog Skill button and selecting the example skills that had been shown before and created in the previous article. Click on the existing skill as shown in Figure 8.
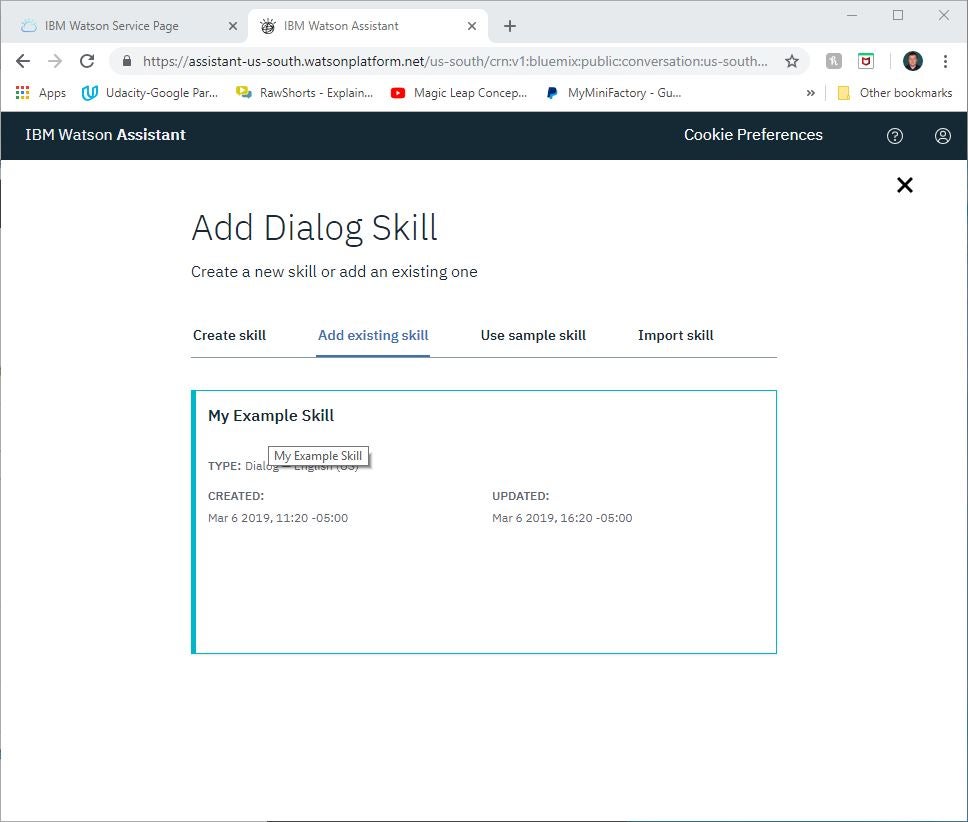
Figure 8: Adding the skills you created to your new bot.
You will be taken back to the Assistance page with the Skill now displayed as shown in Figure 9:

Figure 9: Your Skill is now associated to your Assistant
At this point, you’ve created an assistant and integrated the skills you created into it. The assistant you’ve created can participate in a simple interaction (conversation). It is ready to be posted on a public page and tested! To start this integration, click on the Add Integration link on the right. This will display the Add Integration dialog as shown in Figure 10.
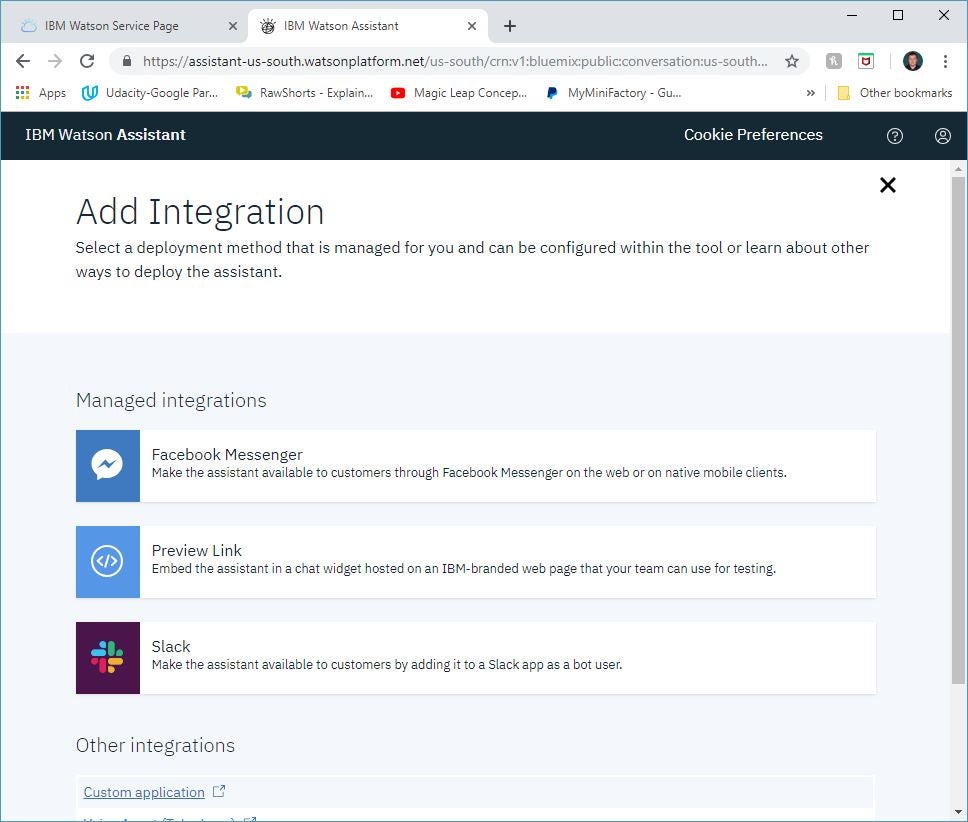
Figure 10: Adding Integration for your assistant.
If you checked the preview link earlier, then in addition to options such as Facebook Messenger, you should also see the Preview Link option. The preview link option allows you to test your assistant on an IBM page. This is a link you can share with your testing team (or friends) to make sure your assistant operates the way you want. Click on the Preview Link option to generate the link. You need to give your link a name and description in order to create it. Once you enter the information and select create, a link will be provided similar to figure 11.

Figure 11: Creating the IBM chat assistant preview link
Note that the link generated is on the IBM Cloud, so you’ll be billed for its use according to your IBM Cloud plan (hence why I blocked the link in the image). If you selected the free plan, it should provide up to 10,000 messages a month at no charge (as of the time this article was written). The plan also allows for use of four dialog skills with up to 100 dialog nodes. This should be enough for testing and very simple use of an assistant. If you go over this, you could be liable for charges.
If you click on the preview link, you should see something resembling Figure 12.

Figure 12: The running assistant
At this point, you should be able to interact with your assistant on the IBM page. Figure 13 in includes a couple of comments typed into the bot that had been created with the Joking intent.

Figure13: joking with the assistant
From Here….
At this point, you’ve created a very basic assistant (bot) that can interact on a site or through a variety of platforms. By using the IBM platform, you are tapping into Watson, which provides the intelligence to understand what users are typing in. This allows for better association to the intents and skills you create within your bot, thus providing a rich interaction. With additional effort, you can have your assistant ask questions and respond to the answers, plus using the APIs, you can kick off additional processes and services as a result of the discussions.
If you are interested in building more complex dialogs for your assistant, then the next step would be to check out IBM’s tutorial at https://cloud.ibm.com/docs/services/assistant?topic=assistant-tutorial#tutorial
